How to install a freestanding mailbox?
, 4 min reading time
, 4 min reading time
A freestanding mailbox is a practical and stylish solution for receiving your mail, especially if your home is set back from the street. But how do you ensure your new mailbox stands securely, can withstand the elements, and lasts for years? In this detailed guide, we explain step-by-step how to install a freestanding mailbox. Also check out our wide range of freestanding mailboxes and choose the model that perfectly fits your garden or driveway.
A freestanding mailbox offers many advantages over a wall-mounted mailbox. You choose the location yourself, such as at the start of your driveway or along your garden path. This adds convenience for both you and the mail carrier. A freestanding mailbox is also usually larger, allowing you to receive small parcels securely. And a well-designed mailbox can be a real eye-catcher, enhancing the look of your garden or property.
Before starting, make sure you have the right tools and materials. What you need depends on the mailbox type and ground conditions. Generally you’ll need:
Pick a spot that’s easily accessible for the mail carrier, preferably near the boundary of your property or at the driveway entrance. Make sure the mailbox doesn’t obstruct vehicles or pedestrians. Check local regulations: the mailbox slot should be between 60 and 180 cm above ground.
Dig a hole about 30-50 cm deep and 20-30 cm wide, depending on your mailbox’s post or base. Heavier models may need a deeper hole for extra stability. A ground auger helps for a neat result.
Put the post or frame in the hole. Use the spirit level to ensure it’s perfectly upright. This prevents the mailbox from leaning once the concrete sets.
Pour quick-set concrete or cement into the hole around the post. Add water if using quick-set concrete and mix well. Keep the post steady as the concrete hardens (usually 10-30 minutes). Check with the spirit level during setting.
Once the concrete has set, mount the mailbox onto the post or base. Follow the manufacturer’s instructions and use the provided fittings. Make sure all screws are firmly tightened.
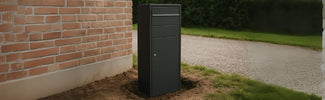
Neatly finish the area around the mailbox. Fill the remaining hole with soil and compact it. You can also add decorative stones or plants for a nice touch.
At Doika, we often hear positive stories from customers who installed their freestanding mailbox themselves. The Peters family from Eindhoven said: “With the clear instructions, installation was a breeze. Our mailbox has stood firm for three years, even after strong storms.”
Convinced of the benefits and ready to install one? Check out our extensive range of freestanding mailboxes. We offer models in various styles, materials, and colors so there’s always one that suits your taste and home. At Doika, you’ll also get expert advice and fast delivery.
With the right prep and materials, installing a freestanding mailbox is perfectly doable yourself. Choose quality and work carefully to enjoy a sturdy, stylish mailbox for years. Have questions or want advice? Contact us or visit our showroom — we’re happy to help!


